Configure Your Navigational Menu in WordPress
You can use the built-in menu editor in your WordPress dashboard to configure the navigational menus on your WordPress website. Navigational menus are the list of pages/links that usually appear at the top of the website that help direct you to the page or content you want to view.
You can see how to create a new page and blog post within WordPress within our helpful Knowledgebase articles, and can see more in our WordPress category.
This guide will help you set up your website menu(s) and configure it as your needs change.
Define a Menu
Before you can configure your menu with links and pages, you have to define it:
-
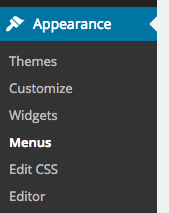
From the left-hand side menu click Appearance.
-
Click Menus to bring up the Menu Editor.
-
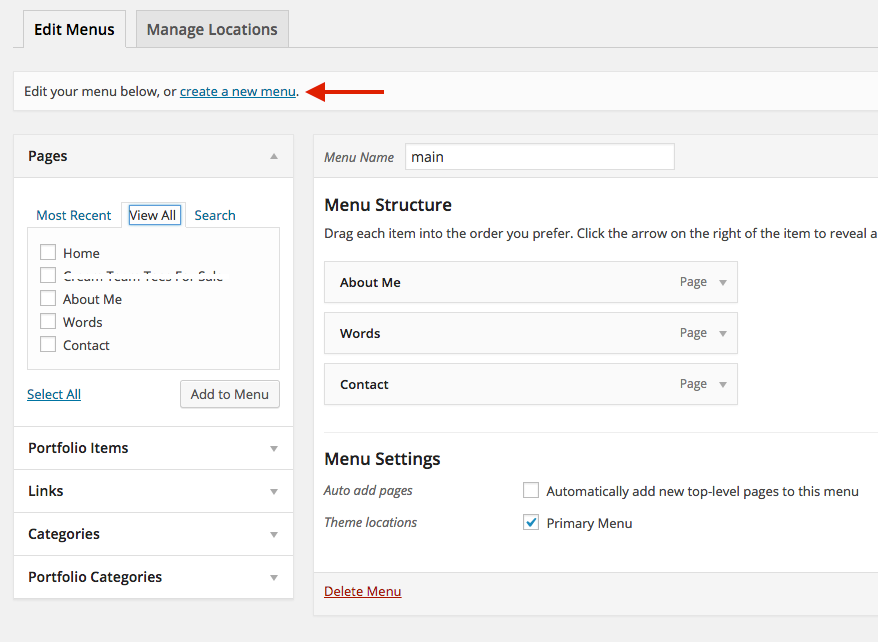
You should be defaulted into the Edit Menus tab; click the Create a New Menu link up near the top of the page.
-
Enter a name for your new menu in the Menu Name box.
-
Click the Create Menu button.
Your new custom menu has now been defined! Now let's add some stuff to it...
Add Items to a Menu
You can add different link types into your menu, which are available for your choosing in a split pane, to the left of the menu you're currently editing. To add a page to your new menu:
-
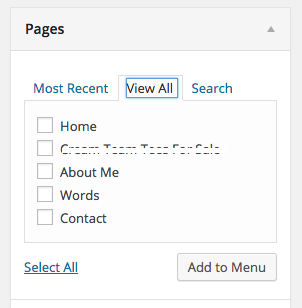
Navigate to the pane on the left titled Pages
-
Click the View All link in the Pages pane to bring up a list of all the currently published Pages on your site
Note: you may have other panes here besides just Pages, like Portfolio Items, Links, Categories or similar. If you want to add one of these as a menu item click the downward-pointing arrow adjacent to the pane of items you want to add from, specify your menu item details and click the Add to Menu as outlined above.
-
Tick the boxes next to the pages you want to add to your new menu
-
When you're done adding Pages click the Add to Menu button
-
When you've saved all the Pages you want to your menu, click the Save Menu button near the right-hand side of the page
Your custom menu has now been saved!
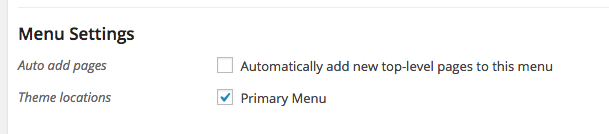
Note: if you want this menu to exist as your primary menu tick the Primary Menu option in the Theme Options section of the Menu Settings box.
Delete a Menu Item
-
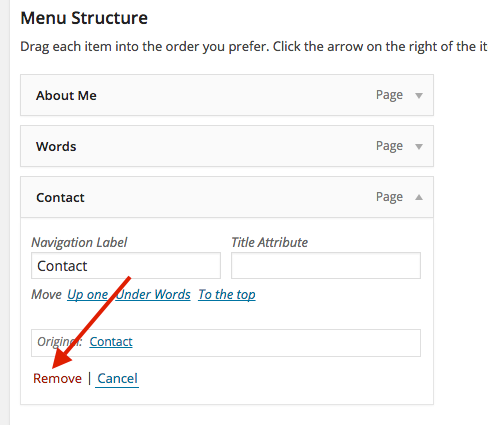
From the Menu Editor page (Appearance, then Menus) locate the menu item that you want to remove in the Menu Structure section
-
Click on the arrow icon in the top right-hand corner of the menu item/box to expand it.
-
Click the Remove link to immediately remove that menu item.
-
Click the Save Menu button to save your changes
Customize Menu Items
You can customize your menu items with some specifics. You can click on the arrow in the top right-hand corner of each menu item to expand it, make changes, and save your menu item changes. See below for a full run-down of the options.
Navigation Label
This field specifies the title of the item on your custom menu. This is what your visitors will see when they visit your site.
Title Attribute
This field specifies the Alternative ('Alt') text for the menu item. This text will be displayed when a user's mouse hovers over that menu item.
Create Multi-level Menus
When planning the structure of your menu, it helps to think of each menu item as a heading document. In a document, main section headings (level 1 headings) are usually the biggest most prominent headings, sub-section headings (level 2 headings) are a little smaller and may have slightly different formatting to help differentiate them and any other subordinate headings (level 3, 4, etc) within the same section are indented by smaller or other differentiated formatting—so that you clearly can see the hierarchy of headings. Menu items work JUST like that.
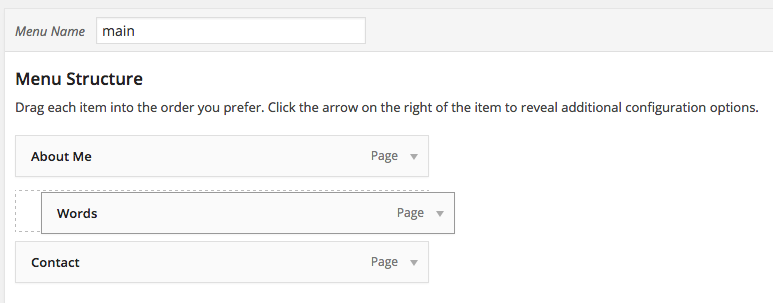
The WordPress Menu Editor allows you to create multi-level menus using a simple 'drag and drop' interface. Drag menu items up or down to change their order of appearance in the menu. Drag menu items left or right in order to create sub-levels (one menu item that exists under a parent menu item, so that it drops down when you hover over it's parent) within your menu.
To make one menu item a subordinate of another, you need to position the 'child' underneath its 'parent' and then drag it slightly to the right:
-
From within the Menu Structure pane, position your mouse over the 'child' menu item (the one you want to be under the 'parent')
-
Hold your left mouse button down on your child menu item and drag it under the category you want to be its parent, and move it a smidge to the right
-
Release your mouse button; your child category should fall into place, slightly to the right of the left edge of your parent category menu item, below it.
-
Repeat these steps for each sub-menu item.
-
Click the Save Menu button in the Menu Editor to save your changes
Add Your Menu to Your Site
Via the Edit Menus Tab
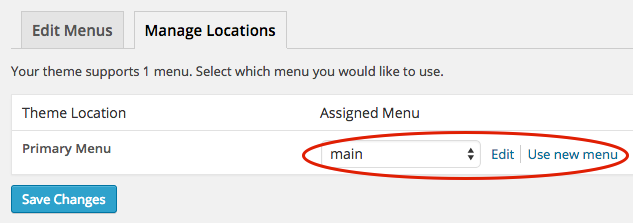
If your current theme supports custom menus, you will be able to add your new menu to one of the Theme Locations:
-
Scroll to the bottom of the Menu Editor window
-
In the section titled Theme Locations, tick the check box for the location where you want your menu to appear
-
Click the Save Menu button once you've made your selection
If you don't see this option, try clicking into the Manage Locations tab near the top... these options should be right there!
Note: if your current theme does not support custom menus, you will need to add your new menu via the Custom Menu widget. Just click Appearance from the left-hand side again, and then Widgets to configure custom widgets.
Congratulations! Your new custom menu has now been added to your site. Woot!
See also Create a New Page in WordPress, Install a WordPress Theme, Install WordPress with Softaculous, Move Your WordPress Site to A Small Orange