Webmail Settings and Options
Instructions applicable for Apple iPhone/iTouch.
Before You Begin
Some more important notes before we begin:
-
Make sure the email address(es) you will be sending from have been authorized for your account in your cPanel.
-
Check that your email server/account have already been set up and is collecting email correctly.
-
Take a note of any settings you change!
-
Only change the items specified. You should not need to change your incoming email settings.
-
These instructions are only for Apple iPhone and iTouch using iOS3. Please see our OS7 setup guide for more info.
Set Up Email on Your Phone
-
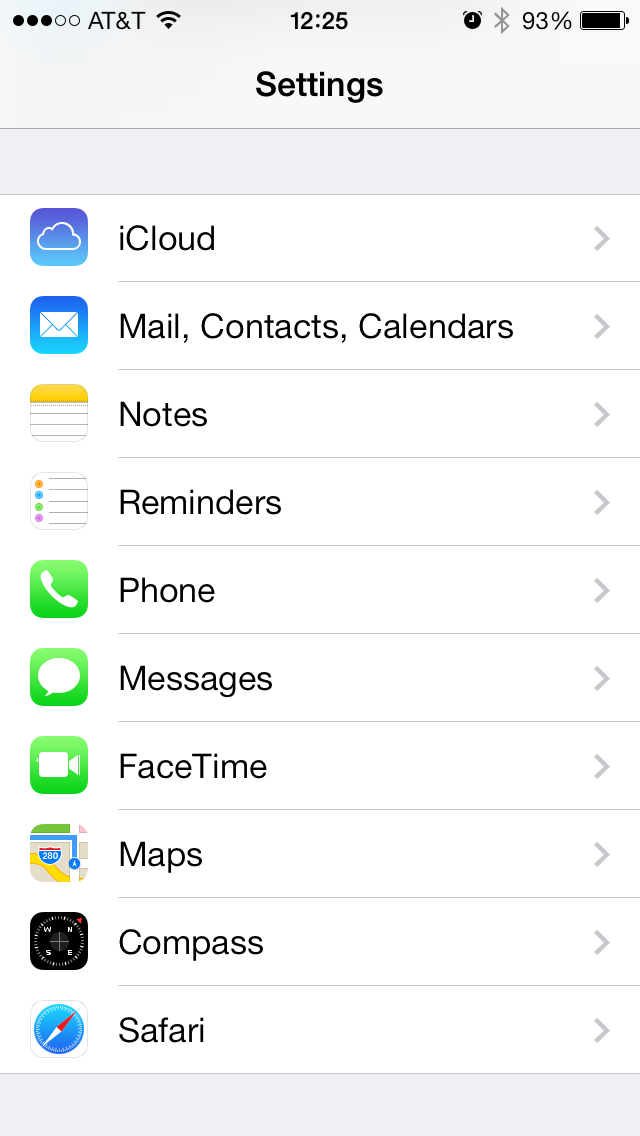
From within your device's home screen, click Settings (gear icon)
-
Scroll down and click 'Mail, Contacts, Calendars'
-
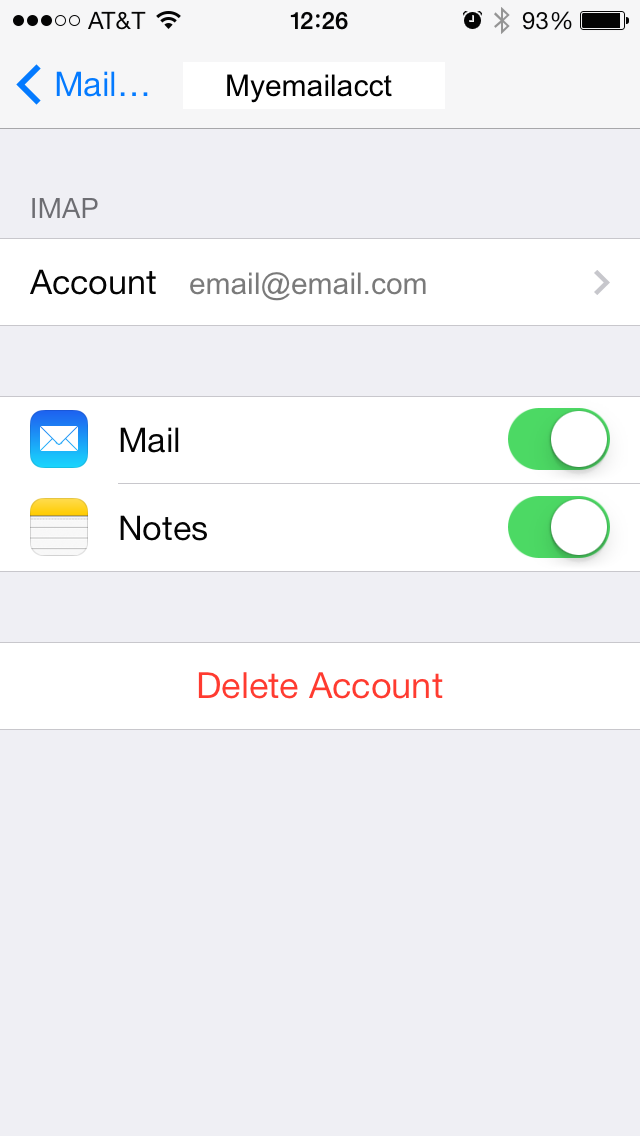
Select the email account to modify from the Accounts section
-
Click the account name again, adjacent to the text 'Account'
-
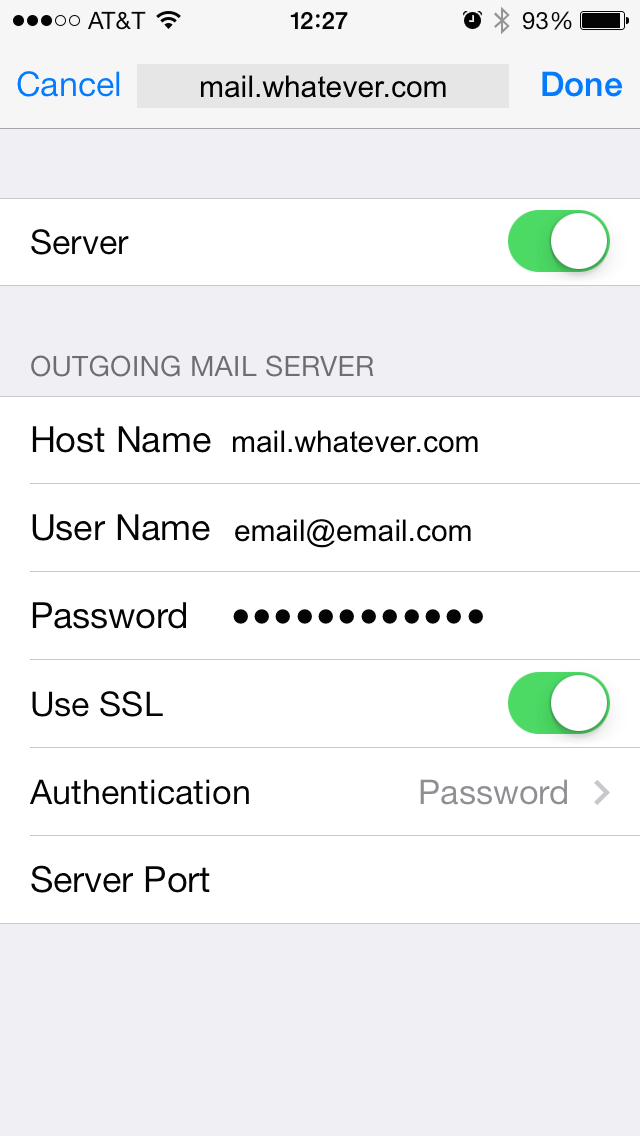
Scroll down to the Outgoing Mail Server section and click 'SMTP'.
-
Click Primary Server.
-
Ensure the slider to the right is in the 'On' position
-
In the Host Name blank, enter your host name as communicated in your Welcome email
-
In the User Name and Password blanks enter that info as supplied to you in your Welcome email
-
Toggle the 'Use SSL' option off unless you want to use SSL and have already enabled SSL for your account
Note: not sure? Want SSL and don't have it? Hit us up and we'll help out. And check out our SSL info page. -
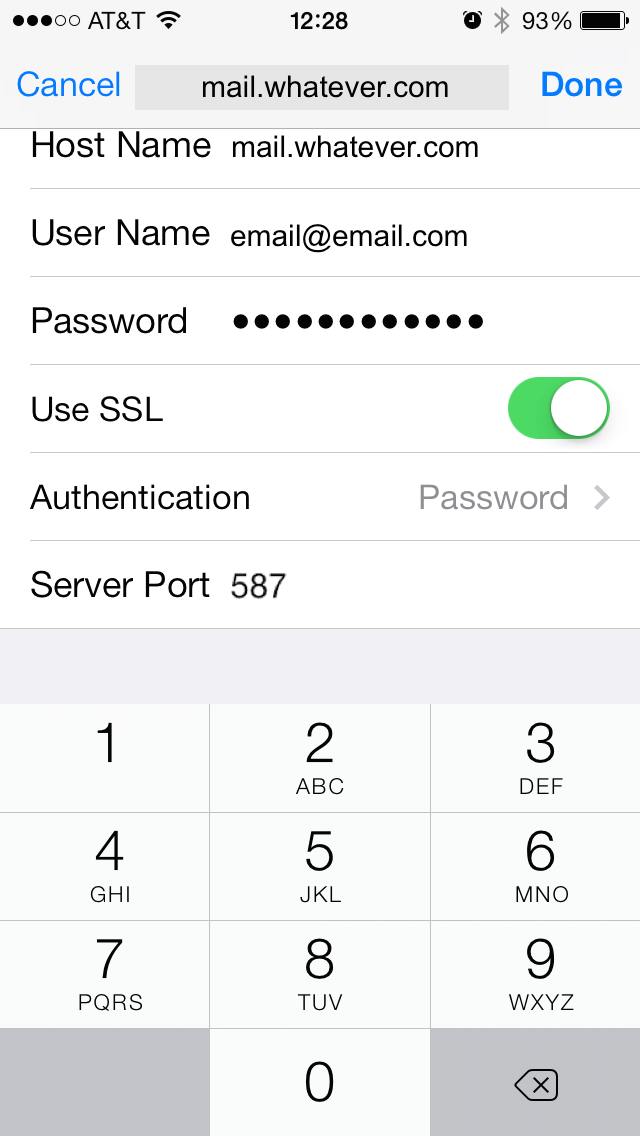
Click Authentication and check the 'Password' option then return back to the previous screen
-
Click Server Port, near the bottom, and change it to one of the alternate port numbers; we recommend you use port but you can also use 25, 26, or 465.
Note: use port 587 if you DO want to use StartTTLS SSL encryption. Otherwise, SSL is available on all ports.
-
Navigate back to the main Settings page... you're done!